From Concept to Glow: How Custom Neon Signs Are Made
Custom neon signs have become a standout choice for home décor, business branding, and event styling. But have you ever wondered how a simple idea transforms into a glowing piece of art? From initial concept to final illumination, the process of creating custom neon signs is a perfect blend of creativity, technology, and craftsmanship.
This blog walks you through the complete journey—from concept to glow—while covering all essential SEO keywords in a natural, reader-friendly way.
1. Idea & Concept Development
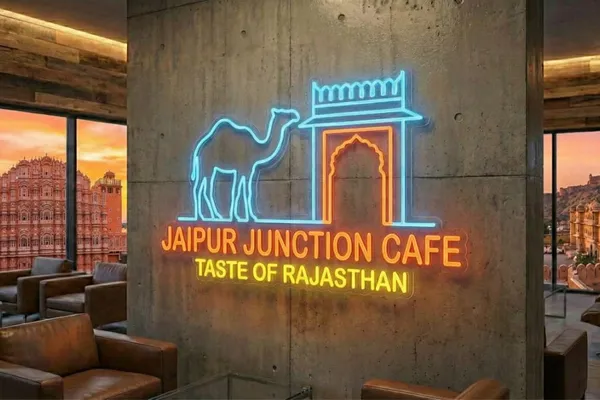
Every custom neon sign starts with an idea. This could be a name, quote, logo, symbol, or brand message. At this stage, customers decide the purpose of the sign—whether it’s for home décor, storefront signage, office branding, or events.
Key considerations during concept creation:
- Text or logo selection
- Intended placement (indoor or outdoor)
- Brand identity or personal style
- Desired glow effect and visibility
This step lays the foundation for creating personalized neon lights that truly reflect the user’s vision.
2. Design & Digital Mockup Creation
Once the concept is finalized, designers create a digital neon sign mockup. This visual preview helps customers see exactly how the custom LED neon sign will look before production begins.
During this stage, designers finalize:
- Font styles and typography
- Neon colors and brightness levels
- Sign dimensions and proportions
- Backing material (usually acrylic)
Digital previews ensure accuracy and customer satisfaction while refining the custom neon sign design.
3. Choosing Colors, Fonts & Size
Customization is what makes custom neon signs so popular. Customers can select from a wide range of neon color options, fonts, and sizes.
Popular choices include:
- Warm white, cool white, pink, blue, red, and yellow neon
- Script fonts for aesthetic décor
- Bold fonts for business signage
- Compact sizes for rooms or large signs for storefronts
These choices directly affect the final glow, visibility, and overall impact of the neon wall light.
4. LED Neon Tube Shaping & Cutting
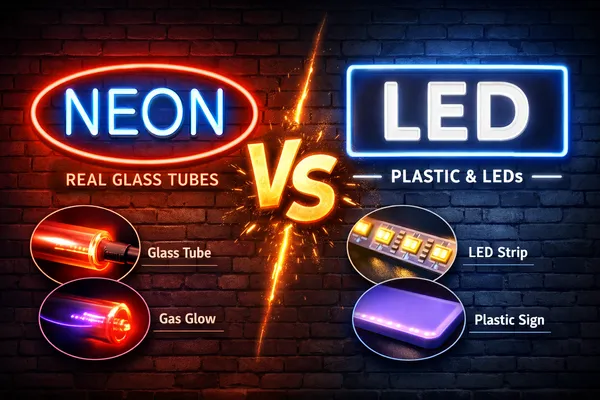
After design approval, production begins. Instead of fragile glass, modern signs use LED neon flex tubes. These flexible tubes are shaped precisely according to the approved design.
This process involves:
- Heating and bending LED neon flex
- Precision cutting for clean curves
- Ensuring uniform light diffusion
This step is critical in achieving the smooth glow associated with LED neon signs.
5. Mounting on Acrylic Backing
Once the neon tubes are shaped, they are mounted onto a transparent or colored acrylic backing. This backing provides structure, durability, and easy installation.
Benefits of acrylic backing:
- Lightweight and sturdy
- Clean, modern appearance
- Easy wall mounting
- Safe for home and business use
This stage transforms neon tubing into a complete custom neon wall sign.
6. Electrical Setup & LED Power Supply
Each custom LED neon sign is fitted with an efficient power system. This includes wiring, adapters, and optional dimmers or remote controls.
Electrical features include:
- Low-voltage LED power supply
- Energy-efficient performance
- Safe operation with minimal heat
- Long lifespan (50,000+ hours)
This ensures the neon sign is both safe and energy-efficient.
7. Quality Testing & Glow Check
Before shipping, every custom neon sign undergoes strict quality checks. The sign is powered on to verify brightness, color accuracy, and structural stability.
Testing includes:
- Uniform glow inspection
- Color consistency check
- Wiring and connection testing
- Overall durability assessment
This guarantees a flawless neon glow effect when installed.
8. Packaging & Safe Delivery
Once approved, the sign is carefully packed using protective materials to prevent damage during transit. Proper packaging ensures safe delivery of custom neon signs to homes and businesses.
Packaging features:
- Shock-resistant wrapping
- Secure box placement
- Installation accessories included
This step ensures your personalized neon sign arrives ready to shine.
9. Easy Installation & Final Glow
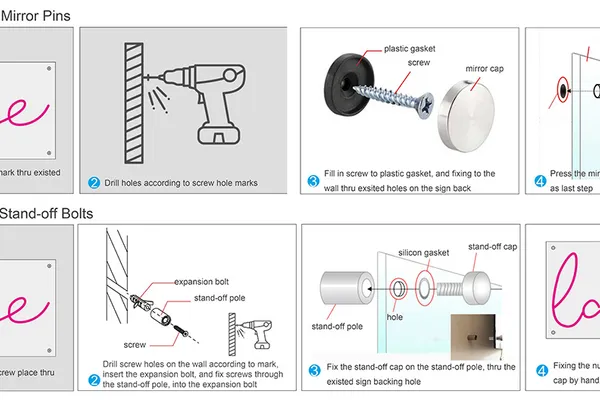
Most custom neon signs are designed for quick and hassle-free installation. With pre-drilled backing and plug-and-play setup, anyone can install them easily.
Installation benefits:
- No professional help required
- Wall-mounted or hanging options
- Instant illumination
Once installed, the concept finally comes to life—transforming ideas into a stunning glowing neon sign.
Conclusion
From a simple idea to a vibrant glow, the journey of creating custom neon signs is a carefully crafted process. Every step—from concept development and digital design to LED shaping and final testing—plays a vital role in delivering a product that’s stylish, durable, and visually impactful.
Whether for home décor, business branding, or special events, custom neon signs are a perfect blend of creativity and modern technology—truly bringing ideas to light.